Body
Purpose:
This article outlines the steps for adding a network printer to your computer.
Getting Started:
Requesting Access to a Printer
Complete the Printer Access Request form to gain access to a network printer.
Adding a Network Printer
Printers should automatically install on your computer once you are granted access to the printer. If requesting access to a printer using the Printer Access Request Form, follow the steps below. If the printer does not show up automatically in your list of printers, use the instructions below to add the printer from the directory.
Adding A Network Printer Using the Directory
Sometimes adding the printer is easier if you search by hostname.
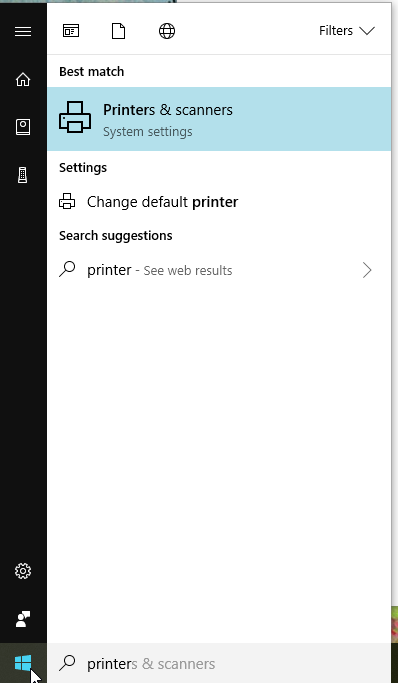
- Open Printers and Scanners, easiest to find by searching in the start menu.
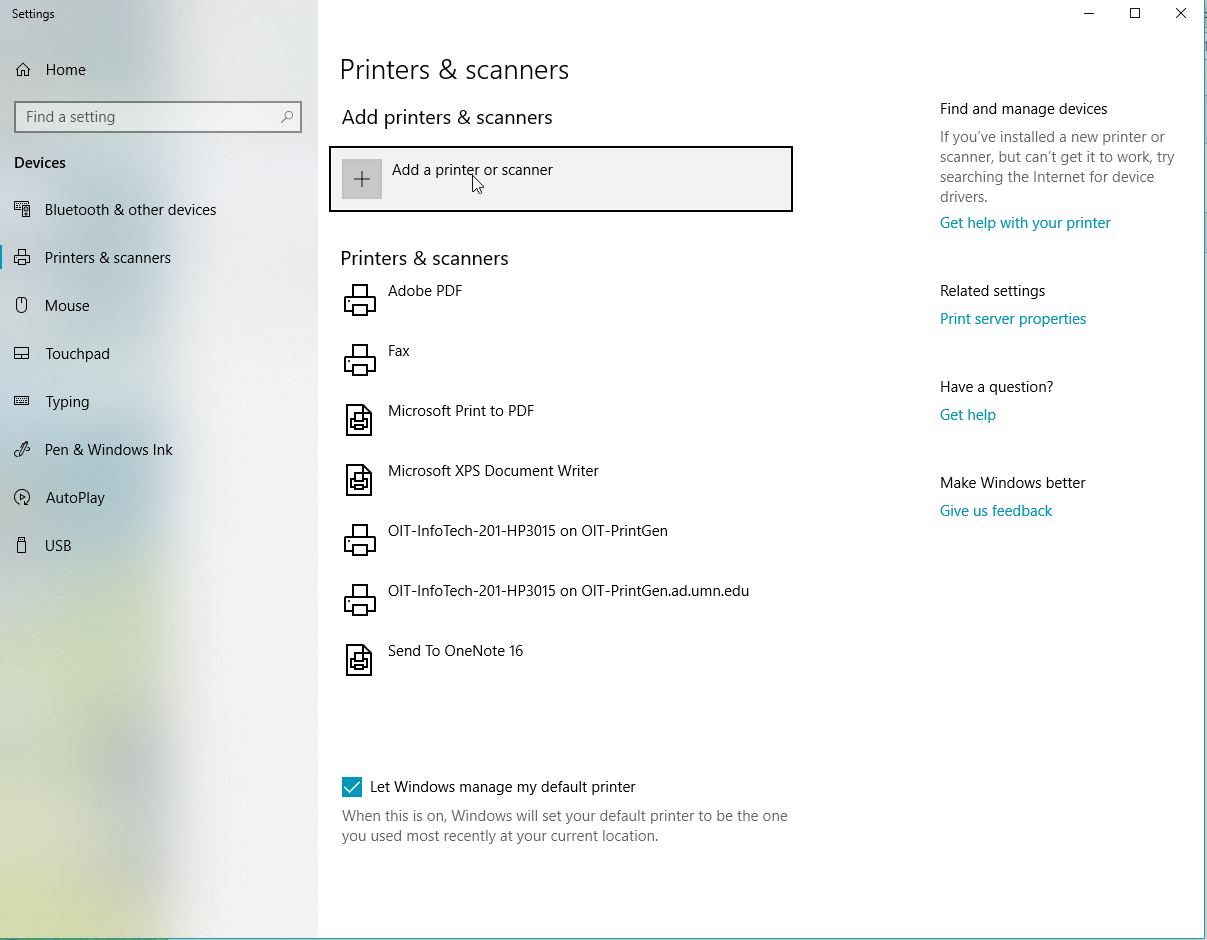
- Select Add Printer or Scanner.
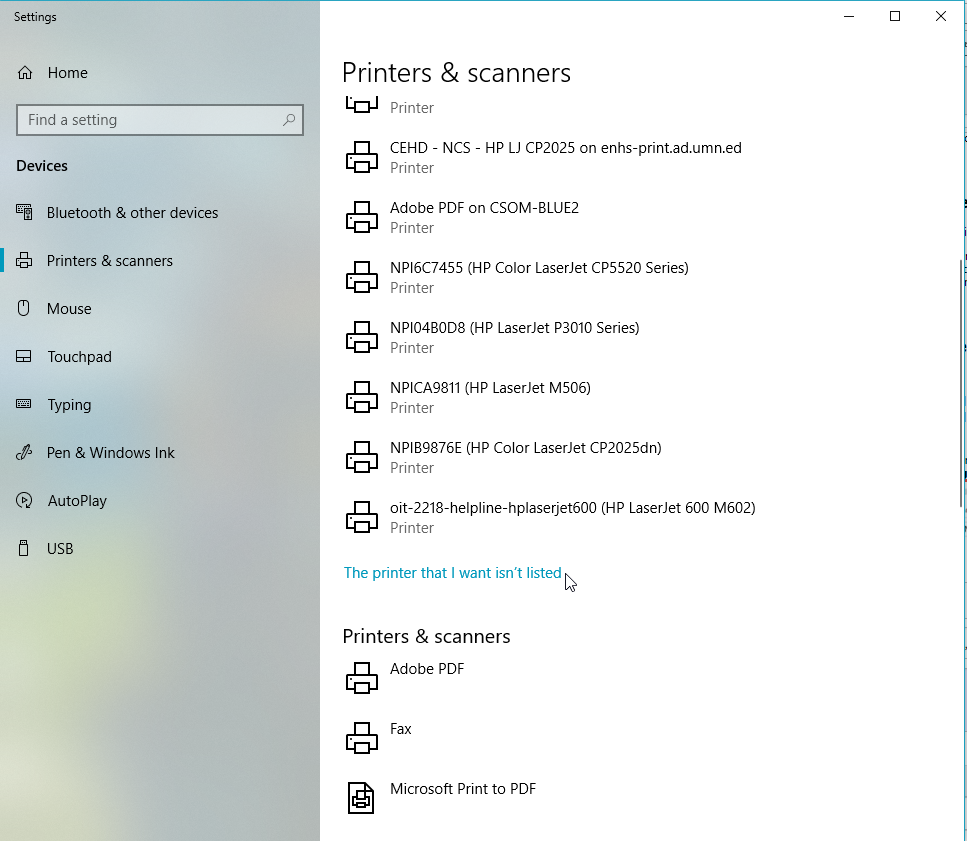
- After the printer list starts populating, scroll down and select the option "The printer that I want isn't listed."
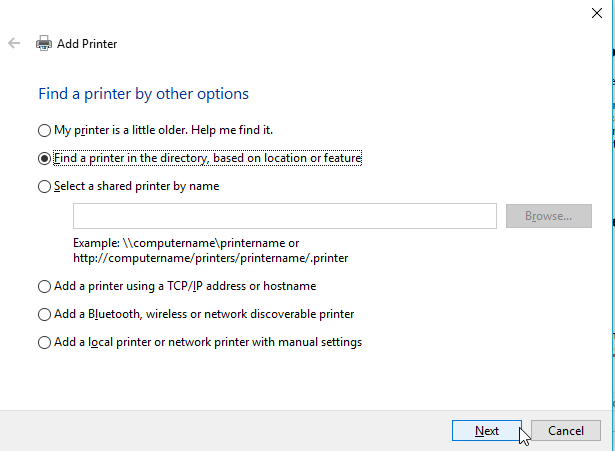
- On the new window that appears, select "Find a printer in the directory, based on location or feature." Then click Next.
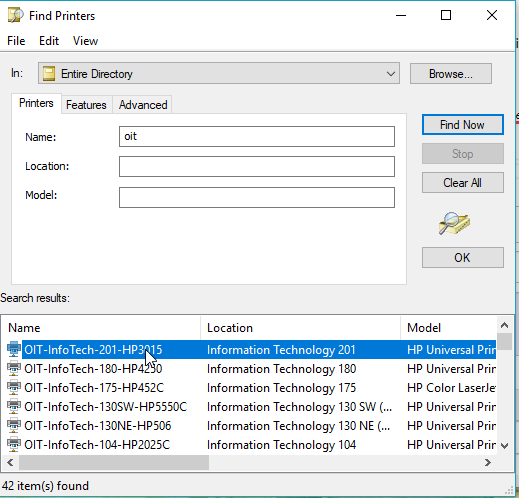
- A new dialog window will appear and in the Name field, you can search for the name of the printer or even the Location of the printer (i.e. building) (OIT is only an example in the screenshot). After you have added your search term, click "Find Now."
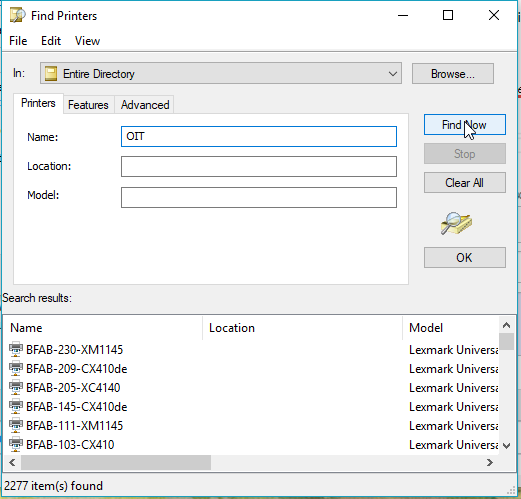
- A list of printers will appear. Double-click the printer you would like to add. Then click next through the prompts that appear and your printer should be added. Printing a test page may show up as an option and is recommended to verify the connection.
